Preparing Your Cabinets for Painting: Cleaning Cabinets Before Painting

A clean surface is essential for a smooth and durable paint finish. Before you start painting your cabinets, you need to thoroughly clean them to remove any grease, grime, dirt, or sticky residue. This will ensure that the paint adheres properly and provides a long-lasting finish.
Cleaning Agents and Tools
The best cleaning agents and tools for your cabinets will depend on the type of finish they have. Here’s a guide to help you choose the right approach:
- For painted cabinets: Use a mild dish soap and warm water solution. A soft sponge or cloth is ideal for scrubbing. Avoid abrasive cleaners or scrubbers that can damage the paint.
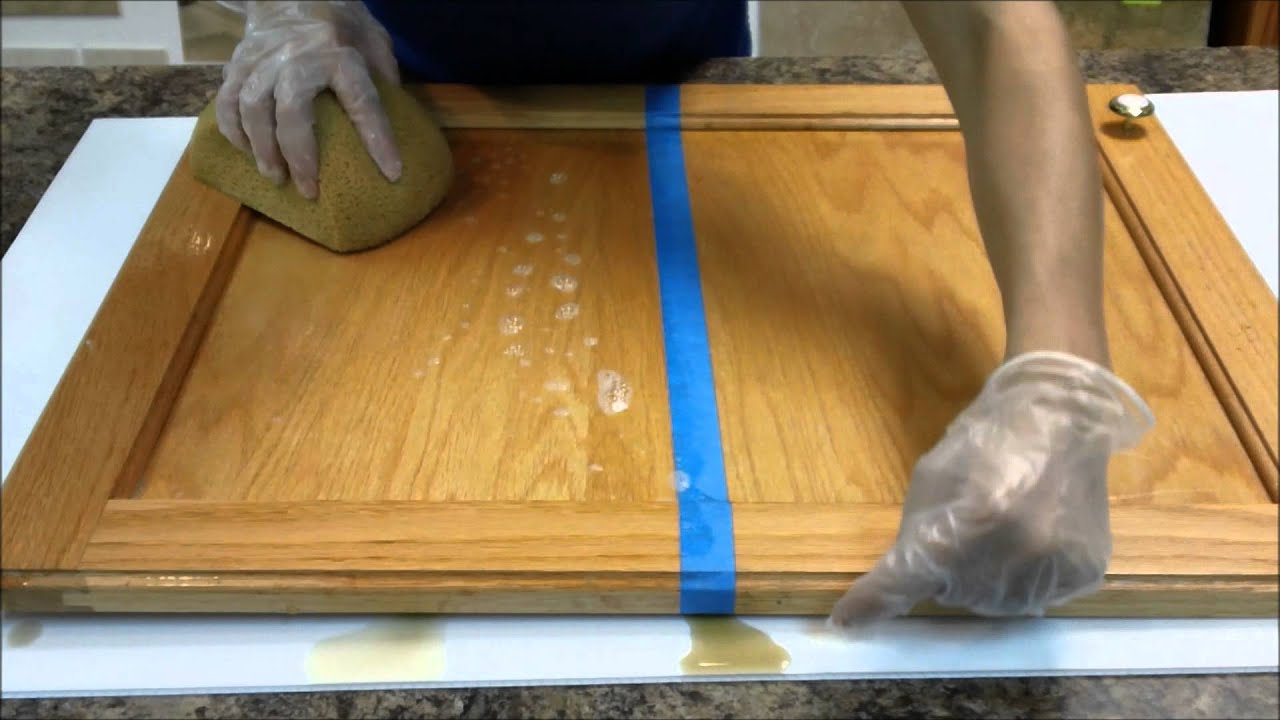
- For stained or varnished cabinets: A mild soap and water solution is generally safe. You can also use a wood cleaner specifically designed for your type of finish. Use a soft cloth or sponge to avoid scratching the surface.
- For laminate cabinets: A mild soap and water solution is usually sufficient. Avoid harsh chemicals or abrasive cleaners that can damage the laminate surface.
Cleaning Cabinet Doors and Drawers
- Remove the doors and drawers: This will allow you to clean both sides of the doors and drawers thoroughly.
- Clean the surfaces: Use your chosen cleaning agent and a soft cloth or sponge to wipe down all surfaces. Pay attention to the edges, corners, and any grooves or carvings.
- Remove any stubborn residue: For sticky residue, you can use a mild degreaser or a mixture of baking soda and water. Apply it to the affected area and let it sit for a few minutes before wiping it clean.
- Rinse and dry: Rinse the doors and drawers with clean water and dry them thoroughly with a clean cloth. Ensure that all surfaces are completely dry before proceeding.
Cleaning Cabinet Frames
- Clean the surfaces: Use your chosen cleaning agent and a soft cloth or sponge to wipe down all surfaces of the cabinet frames. Pay attention to the edges, corners, and any grooves or carvings.
- Remove any stubborn residue: For sticky residue, you can use a mild degreaser or a mixture of baking soda and water. Apply it to the affected area and let it sit for a few minutes before wiping it clean.
- Rinse and dry: Rinse the cabinet frames with clean water and dry them thoroughly with a clean cloth. Ensure that all surfaces are completely dry before proceeding.
Cleaning Checklist
Here’s a checklist to help you ensure your cabinets are thoroughly cleaned before painting:
- Remove all cabinet doors and drawers.
- Remove all hardware, including hinges, knobs, and pulls.
- Clean all surfaces with your chosen cleaning agent.
- Remove any stubborn residue.
- Rinse all surfaces with clean water.
- Dry all surfaces thoroughly.
- Replace all hardware.
- Reinstall all cabinet doors and drawers.
Essential Cleaning Tasks

Before you start painting, it’s crucial to give your cabinets a thorough cleaning. This ensures a smooth, even paint finish and helps the paint adhere properly.
Removing Hardware
Removing hardware like hinges, knobs, and pulls allows for a cleaner paint job and prevents paint from getting stuck in the hardware.
- Use a screwdriver to remove the screws holding the hardware in place. Be careful not to strip the screw heads.
- Place the screws and hardware in a labeled container to prevent loss.
- For stubborn screws, use a penetrating oil or WD-40 to loosen them.
Cleaning Cabinet Interiors
Clean the interior of your cabinets to remove dust, grime, and any lingering odors.
- Remove shelves and drawers.
- Wipe down the interiors with a damp cloth and mild detergent.
- For stubborn stains, use a baking soda paste or a commercial cleaner specifically designed for cleaning cabinets.
- Rinse the interiors with clean water and dry them thoroughly before reinstalling the shelves and drawers.
Removing Old Paint or Varnish
Before painting, it’s essential to remove any old paint or varnish to ensure proper adhesion of the new paint.
- Use a paint scraper to remove loose paint or varnish.
- For stubborn paint, use a chemical paint stripper. Follow the manufacturer’s instructions carefully and wear appropriate safety gear, including gloves and a mask.
- After removing the old paint, sand the surfaces to create a smooth finish for the new paint.
Sanding and Smoothing Surfaces, Cleaning cabinets before painting
Sanding the cabinet surfaces before painting creates a smooth, even surface for the paint to adhere to.
- Use a fine-grit sandpaper (120-180 grit) to remove any imperfections or rough spots.
- Sand with the grain of the wood to avoid creating scratches.
- After sanding, wipe down the surfaces with a tack cloth to remove any dust or debris.
Cleaning Materials and Tools
| Task | Materials and Tools |
|---|---|
| Removing Hardware | Screwdriver, container for hardware |
| Cleaning Cabinet Interiors | Damp cloth, mild detergent, baking soda (optional), commercial cleaner (optional), clean water |
| Removing Old Paint or Varnish | Paint scraper, chemical paint stripper (optional), sandpaper (120-180 grit), tack cloth |
| Sanding and Smoothing Surfaces | Sandpaper (120-180 grit), tack cloth |
Finishing Touches
With your cabinets clean and prepped, you’re ready for the final steps before applying paint. These finishing touches will ensure a smooth, even, and long-lasting paint job.
Priming for a Smooth Finish
Priming your cabinets is crucial for achieving a professional-looking paint job. Primer creates a smooth, even surface for the paint to adhere to, helping to prevent unevenness and imperfections. A good primer also seals the surface, preventing stains from bleeding through the paint.
Choosing the Right Paint
The type of paint you choose will significantly impact the durability and appearance of your painted cabinets. For kitchen cabinets, consider using a high-quality, durable paint, such as:
- Acrylic latex paint: This type of paint is water-based, dries quickly, and is easy to clean up. It’s also very durable and resistant to scratches and chips.
- Oil-based paint: Oil-based paint offers a high level of durability and a smooth, glossy finish. However, it takes longer to dry and requires mineral spirits for cleanup.
- Epoxy paint: Epoxy paint is extremely durable and resistant to moisture, making it a good choice for kitchen cabinets. However, it can be more challenging to apply than other types of paint.
Applying Paint Evenly
To achieve a professional finish, apply paint evenly using a high-quality brush or roller.
- Use long, smooth strokes: This will help to avoid brush marks and create a smooth, even finish.
- Apply thin coats: Thin coats are easier to apply evenly and allow the paint to dry properly. It’s better to apply several thin coats than one thick coat.
- Let each coat dry completely before applying the next: This will help to prevent the paint from becoming cloudy or uneven.
Protecting Your Painted Cabinets
Once your cabinets are painted, it’s important to protect them from damage.
- Apply a sealant: A sealant will help to protect the paint from scratches, chips, and moisture. There are many different types of sealants available, so choose one that’s appropriate for your needs.
- Avoid using harsh cleaners: Use a mild soap and water solution to clean your painted cabinets. Avoid using harsh chemicals or abrasive cleaners, which can damage the paint.
- Use furniture pads: Use furniture pads to protect your cabinets from scratches when placing objects on them.
Common Painting Mistakes to Avoid
Here are some common painting mistakes to avoid:
- Not prepping the surface properly: A poorly prepped surface can lead to uneven paint application and a less durable finish.
- Using the wrong type of paint: Using the wrong type of paint can result in a finish that is not durable or does not look its best.
- Applying paint too thickly: Thick coats of paint can take longer to dry and can lead to unevenness and drips.
- Not letting each coat dry completely before applying the next: This can result in a cloudy or uneven finish.
- Not protecting the painted surface: A sealant or other protective coating will help to prevent damage to the paint.
Cleaning cabinets before painting – Cleaning your cabinets before painting is essential for a smooth, long-lasting finish. Once the paint is dry, you can replace the hardware, perhaps with a set of 4 inch cabinet door handles for a modern touch. Be sure to clean the handles themselves before installation, too, to avoid any unwanted smudges or fingerprints on your freshly painted cabinets.
Cleaning cabinets before painting is a crucial step, ensuring a smooth and even finish. While you’re planning your home improvements, consider the impact of lighting, especially in bedrooms. Recessed lights in bedroom layout can create a warm and inviting ambiance, complementing the freshly painted cabinets and adding a touch of sophistication to the space.
After all, a well-lit room makes any project, big or small, truly shine.
